

How To Switch Camera To Front Moto
Introduction
If the front camera on your Moto G4 is no longer working, follow this step past step guide to supplant it yourself.
-
-
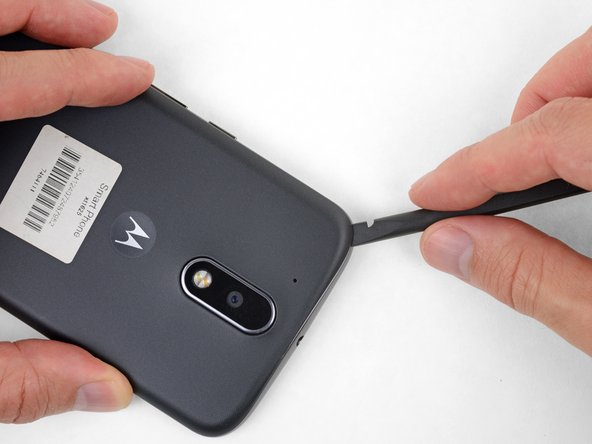
Insert a fingernail or a spudger into the notch on the bottom edge of the phone, near the charge port.
-
Gently twist or pry to open a modest gap betwixt the back cover and the body of the telephone.
-
While keeping your tool (or fingernail) inserted into the gap between the back cover and the torso of the phone, slide it around the corner to begin loosening the plastic clips property the cover in place.
-
-
-
Slide your tool all along the side of the phone to separate more of the clips securing the back cover.
-
-
-
Go along your tool inserted slightly under the back comprehend, and slide it around the summit corner.
-
If necessary, go on prying around the remaining edges of the phone until the back comprehend comes free.
-
-
-
Remove the back comprehend.
-
-
-
Button to eject and remove the MicroSD and SIM cards (if installed).
-
-
-
Utilise a spudger to pry up the rubber cover for the photographic camera wink connector.
-
-
-
Remove the safe cover.
-
-
-
Use a spudger to disconnect the photographic camera flash connector past prying it straight up.
-
-
-
Apply a T3 Torx driver to remove the 19 identical 3.1 mm screws securing the midframe.
-
-
-
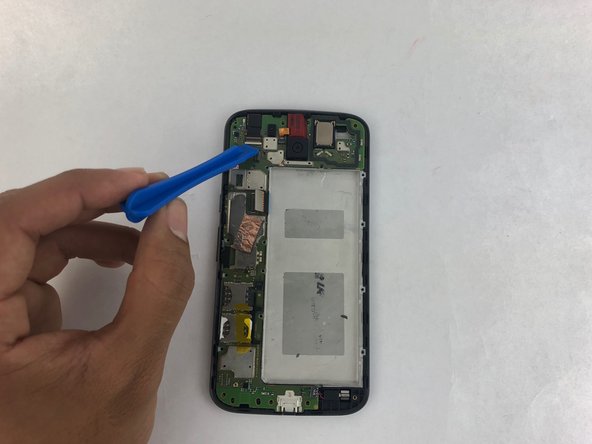
Insert a spudger under the midframe at the top left corner, and gently twist to carve up information technology from the trunk of the phone.
-
-
-
Remove the midframe.
-
-
-
Insert a thin tool (such as one of your tweezer tips) under the red and blackness bombardment wires, and slide it underneath the battery connector.
-
Gently pry straight upwards to disconnect the battery.
-
-
-
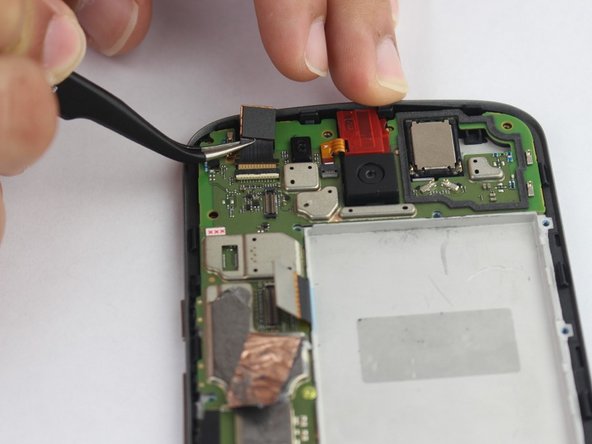
Use your spudger to pry up the forepart-facing camera and make certain it separates safely from the frame.
-
Peel back and remove whatsoever tape covering the front-facing camera's flex cablevision connector.
-
Pry up with your spudger or other ESD-safe tool to flip open the locking flap on the forepart-facing camera's ZIF connector.
-
Gently pull the photographic camera's flex cable free from the ZIF socket.
-
-
-
Remove the forepart photographic camera.
-


Determination
To reassemble your device, follow these instructions in reverse order.
Embed this guide
Choose a size and re-create the code below to embed this guide as a small widget on your site / forum.
Preview
Source: https://www.ifixit.com/Guide/Moto+G4+Front-facing+Camera+Replacement/105491
Posted by: dentsuarry88.blogspot.com
0 Response to "How To Switch Camera To Front Moto"
Post a Comment